The loss of the Hipper, 31 Dec 1942
Force A, consisting of the heavy cruiser Admiral Hipper and two destroyers, formed part of the German surface forces attempting to intercept and destroy Allied convoy JW51B (which was heading for Murmansk with supplies for the Russian forces).
The Royal Navy's Force 12, consisting of the cruisers HMS Belfast and HMS Ajax, and two destroyers, formed part of the protection force for the convoy.
The Royal Navy's Force 12, consisting of the cruisers HMS Belfast and HMS Ajax, and two destroyers, formed part of the protection force for the convoy.
First contact
Force A and Force 12 made first contact with each other, by radar, at 23:30 on 30 December. The weather at the time was atrocious, with Force 10 winds and heavy rain. Both commanders, uncertain to of the exact nature of their opposition, reported back to their respective commanders.
The weather improves
The weather began to improve at dawn on the 31 December, with conditions dropping from Force 10 to Force 7; still awful, but just good enough for effective offensive action. The Germans, having mistaken Force 12 for the JW51B convoy, closed in to attack.
The first shots
The German ships, situated to the north, approached the British. The latter were steaming in a westerly direction at the time, so Robert Likely detached the destroyer Whirlwind to close and identify the approaching radar contacts.
The two forces closed rapidly and made visual contact with each other at about 00:06, at a distance of 10,000 yards.
Hipper immediately opened fire on HMS Whirlwind with her 8" main guns and her secondaries, with devastating effect: torpedo tubes and C turret were knocked out and, of even more concern to the crew, the ammunition store was hit, causing a fire.
Belfast and Ajax returned fire and, despite the weather, hit the Hipper hard. Belfast's rounds knocked out both engine rooms, immobilising the ship and rendering the main turrets temporarily useless because of lack of power. Ajax hit both A and B turrets on the Hipper, knocking them out.
The loss of HMS Whirlwind
HMS Whirlwind's ammunition fire could not be extinguised, despite valiant efforts from the crew, and she exploded and immediately sank.
Hipper's crew managed to restore power so that she could move again and use her main armament. She began firing on Ajax, whilst Max Schultz engaged the Belfast; the fire from both ships was ineffective.
Belfast and Ajax, sensing Hipper was badly damaged, closed in for the kill. Ajax destroyed Hipper's B and Z turrets and, more importantly, hit her engine room again, bringing her to a stop again. Belfast's gunners knocked hit Hipper's ammunition, starting a fire.
Things get worse for Hipper
Hipper's crew were now struggling with hits to both engine rooms and an ammunition fire. They concentrated their efforts on the latter and were able to bring it under control.
Firing continued between both sides but, unlike earlier, was ineffective.
Firing continued between both sides but, unlike earlier, was ineffective.
Hipper alone
With the British closing in his stricken ship, the Hipper's commander decided to save his two German destroyers and ordered them to disengage for safety to the east. Hipper continued to take fire, losing some of its torpedo tubes.
The end for Hipper
Robert Likely split his force, with Ajax, slightly to the east, monitoring the German destroyers, and with Belfast closing in for the kill on Hipper.
Further hits from Belfast and Ajax took their toll on Hipper and, at 00:36, the blazing ship sank.
Further hits from Belfast and Ajax took their toll on Hipper and, at 00:36, the blazing ship sank.
Battle of X17A
Date:
31 December 1942
Location:
North Cape, Arctic Sea
Result:
British victory
Belligerents

Germany

United Kingdom
Commanders and leaders

(Alex J)

Robert Likely (Al D)
(Jef C)
(Jef C)
Strength
CA Admiral Hipper
DD Leberecht Maass
DD Max Schultz
DD Leberecht Maass
DD Max Schultz
CL Belfast
CL Ajax
DD Encounter
DD Whirlwind
CL Ajax
DD Encounter
DD Whirlwind
Losses
CA Admiral Hipper - sunk
DD Leberecht Maass - ???
DD Max Schultz - ???
DD Leberecht Maass - ???
DD Max Schultz - ???
CL Belfast - ???
CL Ajax - ???
DD Encounter - ???
DD Whirlwind - sunk
CL Ajax - ???
DD Encounter - ???
DD Whirlwind - sunk
Game
General Quarters III
Wassail Game Club, Frome, UK
28 April 2011.
Wassail Game Club, Frome, UK
28 April 2011.
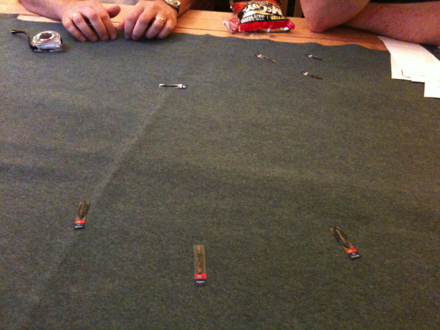
Initial contact, viewed from the north. Hipper, flanked by two destroyers, heads towards the British. HMS Whirlwind turns off towards the Germans to investigate, whilst the main force heads west.
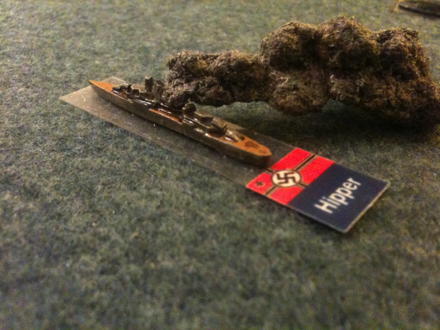
The Hipper, on fire, begins to sink.