
6 mm figures
GHQ
I generally use GHQ figures. See http://www.ghqmodels.com/ for details.
Painting figures
I have tried a variety of methods, and I think the following gives the best results for me.
You may think different - painting is not only a compromise between time and detail, but also depends on your particular preferences.
In this example I'm painting some GHQ British Vickers teams. Unfortunately my digital camera cannot focus on anything closer than 5 inches, so the images all tend to look the same!
Step 1 Prepare the figures by removing any flash. Wash in detergent and water to remove any grease. Allow to dry. Temporarily base them on scraps of card, thin MDF, or whatever. | |
Step 2 I don't use to bother with undercoating, but I now use an acrylic grey undercoat spray can, designed for respraying cars. I then apply the true colour of the uniform. In the case of the British infantry illustrated here, I am using Tamiya XF-51 Khaki Drab. Allow to dry. |  British Vickers MMG teams (GHQ) get a coat of Khaki Drab. |
Step 3 Dry brush with the same colour, but mixed with the same volume of white (in this case Tamiya XF-2 Flat White). | 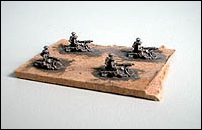 Followed by a dry brush of 50:50 mix of Flat White and Khaki Drab. |
Step 4 Paint the haversacks with khaki (Tamiya XF-49 Khaki). Ideally this would be mixed 50:50 with white again - but this time I couldn't be bothered. Step 5 Paint the machine guns and boots grey (Tamiya XF-24 Dark Grey). I never use black - it always looks too dark. Then use brown paint (I use Tamiya XF-52 Flat Earth) for rifles and the figure bases, if there are any. | 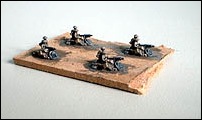 Now the haversacks (khaki), and boots and guns (dark grey), have been painted. |
Step 6 Paint hands and faces (Tamiya XF-15 Flat Flesh). It doesn't matter if I get flesh all over the helmet, I paint them in the next step Step 7 Paint helmets. I use XF-13 JA Green, it is a bit too green, but makes the British figures easier to distinguish from the Germans (with their grey helmets). |  Faces and helmets now painted. |
Step 8 Wash the figures with a very dilute mix of india ink and water. The ink will collect in the recesses of the figures and give them more depth. | 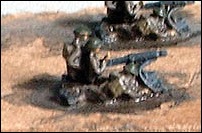 After the ink wash. |
The figures can then be removed from the temporary base and mounted on the final bases (see the 6 mm models > Bases and markings section). | 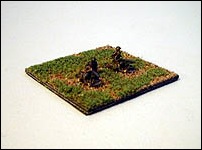 Flocked base, just needs some bushes adding now. |