

Wargames table
Introduction
I don't have the luxury of a permanent wargames room, so needed a playing surface that could be easily packed away.
Note: I now use a hexagon based terrain system, and do things a bit differently. See Hexagon terrain for more information.
The tables
We had a couple of old Ikea tabletops, with tubular steel legs that you screw into the tabletops. These were ideal.
Each one measures 1200 mm x 800 mm (4 foot x 2.5 foot). This is probably big enough for a Crossfire game between two companies (assuming you are using standard base and terrain sizes). The two tables give 4 foot by 5 foot, close enough to the 4 foot by 6 foot size that is pretty standard for the Hit the Dirt scenario book (see Crossfire > Intro for more info on Crossfire).
Rather than fix the legs to the top by screws each time (which would wear the MDF tabletop pretty quickly), I instead fitted some plastic block things used by woodworkers. These now allow the legs to be fitted with bolts that fit into the plastic block things.
The block things are usually used in mating pairs, and I use them as such to hold the two tables together once they are up on their legs.
 One of my two wargames tables. | 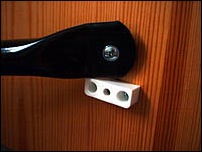 A "block thing" fixed to the back of the tabletop, with a leg and bolt, ready for insertion. |
Colouring the tables
I initially planned on colouring the tabletops with flock powder, but I (well, we) decided that it would come off too easily and leave dust everywhere.Plan B was to use green and brown spray paint to give a nice mottled appearance. But I couldn't find any matt spray paint in suitable colours - gold, yes; blue, yes; vile green, yes; natural green, no.
Plan C was to use emulsion paint, painting a background colour and then sponging on other colours. I trotted off to the local DIY shop and found that (i) the paint colour range was limited, and (ii) the tubs are bleeding big and expensive. I then noticed the Dulux colour mixing machine. Although the large tubs are quite expensive, they can make up sensibly sized tester pots for about 2 pounds each. I grabbed a load of swatches and found that the following Dulux colours were just what I wanted:
Base colour - Chalky Downs 1 30YY 20/193 Excellent match for dark earth Javis flock powder (which I use for my model bases)
First accent colour - Chalky Downs 2 30YY 33/145 Lighter variant of the base colour
Second accent colour - Indian Ivy 1 42GY 09/205 Excellent match for light green foliage flock from Gaugemaster (which I also use for my bases)
I set to work sponging away, and am pretty pleased with the result. I use the same technique for my cork hills.
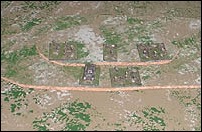 British infantry platoon and a Churchill (GHQ) on a hill. (Staged shot - note lack of other terrain!) | 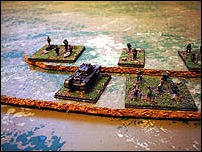 Close up of the British on the hill. |