
Modular buildings
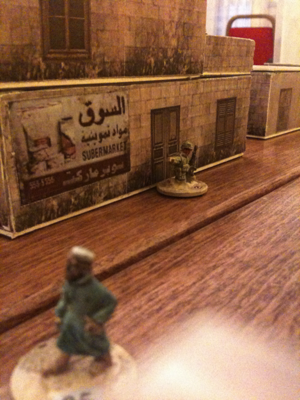
I needed a large number of 20 mm scale buildings for our games of Dan Verssen's Special Forces, and didn't have much time to make them, so came up with the following approach. Not only is it a very rapid way of making buildings, but it also gives you great flexibility in layout, and easy storage.
The basic idea is to make a series of separate floors that are held together with magnetic strip.
The basic idea is to make a series of separate floors that are held together with magnetic strip.
To make the models, in addition to the usual knife, glue, etc. you need:
- foamboard
- card
- a printer
- some first-person shooter computer game, or a camera, or artistic skill
- steel paper
- magnetic sheet
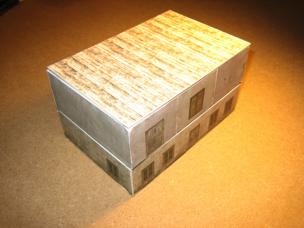
Two storey building.
Here is what to do, in this case for flat-topped Middle East buildings:
Decide on a room height (H). I chose 40 mm.
Choose a minimum side length of square (W). This should be wider than a scale door or window. All the buildings you make will be a multiple of this. I chose 50 mm x 50 mm. Most of my resulting buildings are 2 wide by (2 or 3) long, giving buildings that are 100 mm wide and (100 mm or 150 mm) long.
Planning
Decide on a room height (H). I chose 40 mm.
Choose a minimum side length of square (W). This should be wider than a scale door or window. All the buildings you make will be a multiple of this. I chose 50 mm x 50 mm. Most of my resulting buildings are 2 wide by (2 or 3) long, giving buildings that are 100 mm wide and (100 mm or 150 mm) long.
Artwork
Design some artwork on the computer, each item being H high and W wide. Do a variety of these rectangles, some with doors, some windows, some plain. You can draw these yourself, use photos you have taken of real buildings, or (easiest) take screenshots from within a first-person shooter computer game.
Also create some floor and roof artwork, consisting of tiles that are W by W sized.
So, in my case, I ended up with artwork for bits of wall, some with doors, some with windows, some with inside wall artwork, some with outside wall artwork, each 50 mm wide and 40 mm high. I also ended up with some earth and tiled floor artwork 50 mm square, and some concrete and
Making the buildings
First choose a building size. As an example, let's say 2 tiles by 3 tiles in plan, two storey high. All the following dimension are for my chosen values of H and W.Cut three pieces of card 100 mm x 150 mm, two for floors, one as a roof.
Print out 12 of your floor tiles and 6 roof tiles, and glue them down onto each piece of card.
Now cut out a long strip of foamboard 40 mm high. Then cut this down to four lengths of 150 mm (long walls) and four lengths of 100 mm (short walls). Print out the appropriate number of wall tiles, some with doors, some with windows, and glue them onto both sides of the foam (matching doors and windows up on opposing sides of the same piece of foam).
Glue these walls down to the floors. You will have to figure out your own procedure for mitring the corners.
When dry, put strips of steel paper on the tops of the walls.
Also put magnetic strip on the bottom edges of each floor, and on the bottom of the roof.
Finished!
Flexibility
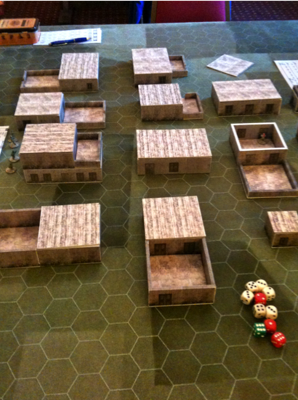
Once you have built a range of building sizes you can mix and match sections to give you great flexibility in building configurations.Storage
Storage is relatively easy because the buildings can be stripped down and easily stacked. All the buildings in the top image on this page can be fitted in one 9L box from Really Useful Boxes,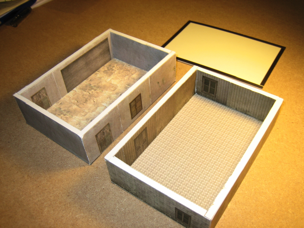
Two 2x3 buldings. Note the white steel paper topping the walls, and the black magnetic strip on the underside of the roof. Not shown is the similar pieces of magnetic strip under each floor.
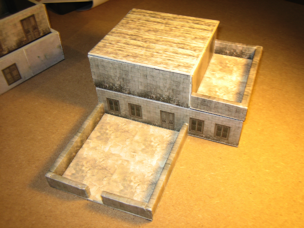
A 2x2 on a 2x3, with a 2x2 roof, a 2x1 walled roof, and a 2x2 walled courtyard/roof.